Generating static tiles
As mentioned in the previous chapter, the IIIF Image API defines the following structure:
http://host:port/identifier/region/size/rotation/quality.format
It is possible to generate images that fit this URL structure and conform to the IIIF Image API using a tile generator. This will generate the minimum required amount of files to implement the IIIF Image API. It does have some limitations, the main one being it is not possible to request images of a size that haven't been pre-generated. This type of pre-generated IIIF Image is known as a Level 0 implementation.
To generate these IIIF images we are going to use a IIIF tilling program which is available on Github. This workshop is useful for those that are looking for a cheap method of making a small amount of images available although there are instances where this method can be scaled to support hundreds of thousands of images. See this article for a method of making level 0 images scalable: The Code4Lib Journal – Scaling IIIF Image Tiling in the Cloud.
Prerequisites
Java
In this workshop we will install and run a IIIF Image server and for this you will need Java 11 installed.
To verify you have the correct package installed, you can run the following command from a terminal or command prompt:
$ java -version
# java version "1.11.0_102"
You should see version 1.11.x. For more information on the install options see:
Step 1: Download the IIIF Tiler
- Navigate to the release page: https://github.com/glenrobson/iiif-tiler/releases/tag/0.9.1
- Click the
assetsdrop down - Download iiif-tiler.jar
- Store this jar file in your
~/iiif-workshopdirectory
Step 2: Prepare your image files
- Move the image files you want to work with into your
~/iiif-workshopdirectory
Step 3: Generate the IIIF Image tiles
Now either:
- Double click on the
iiif-tiler.jarfile in Finder or Windows.
or
- from the command line run:
cd ~/iiif-workshop
java -jar iiif-tiler.jar
- This will generate the IIIF image tiles in a
iiifdirectory for every image it finds in the same directory as the iiif-tiler.jar.
Common issues:
If you see the following error:
Exception in thread "main" java.lang.IllegalArgumentException: Failed to find combination under 100 files
Try running the following command:
java -jar iiif-tiler.jar image_filename 5
Where image_filename is the filename of your image e.g. image.jpg
Step 4: Point the Chrome webserver to your iiif-workshop directory
We will cover the Chrome WebServer in more detail in the Presentation API session but this plugin makes your laptop work like an image server.
- Open Chrome
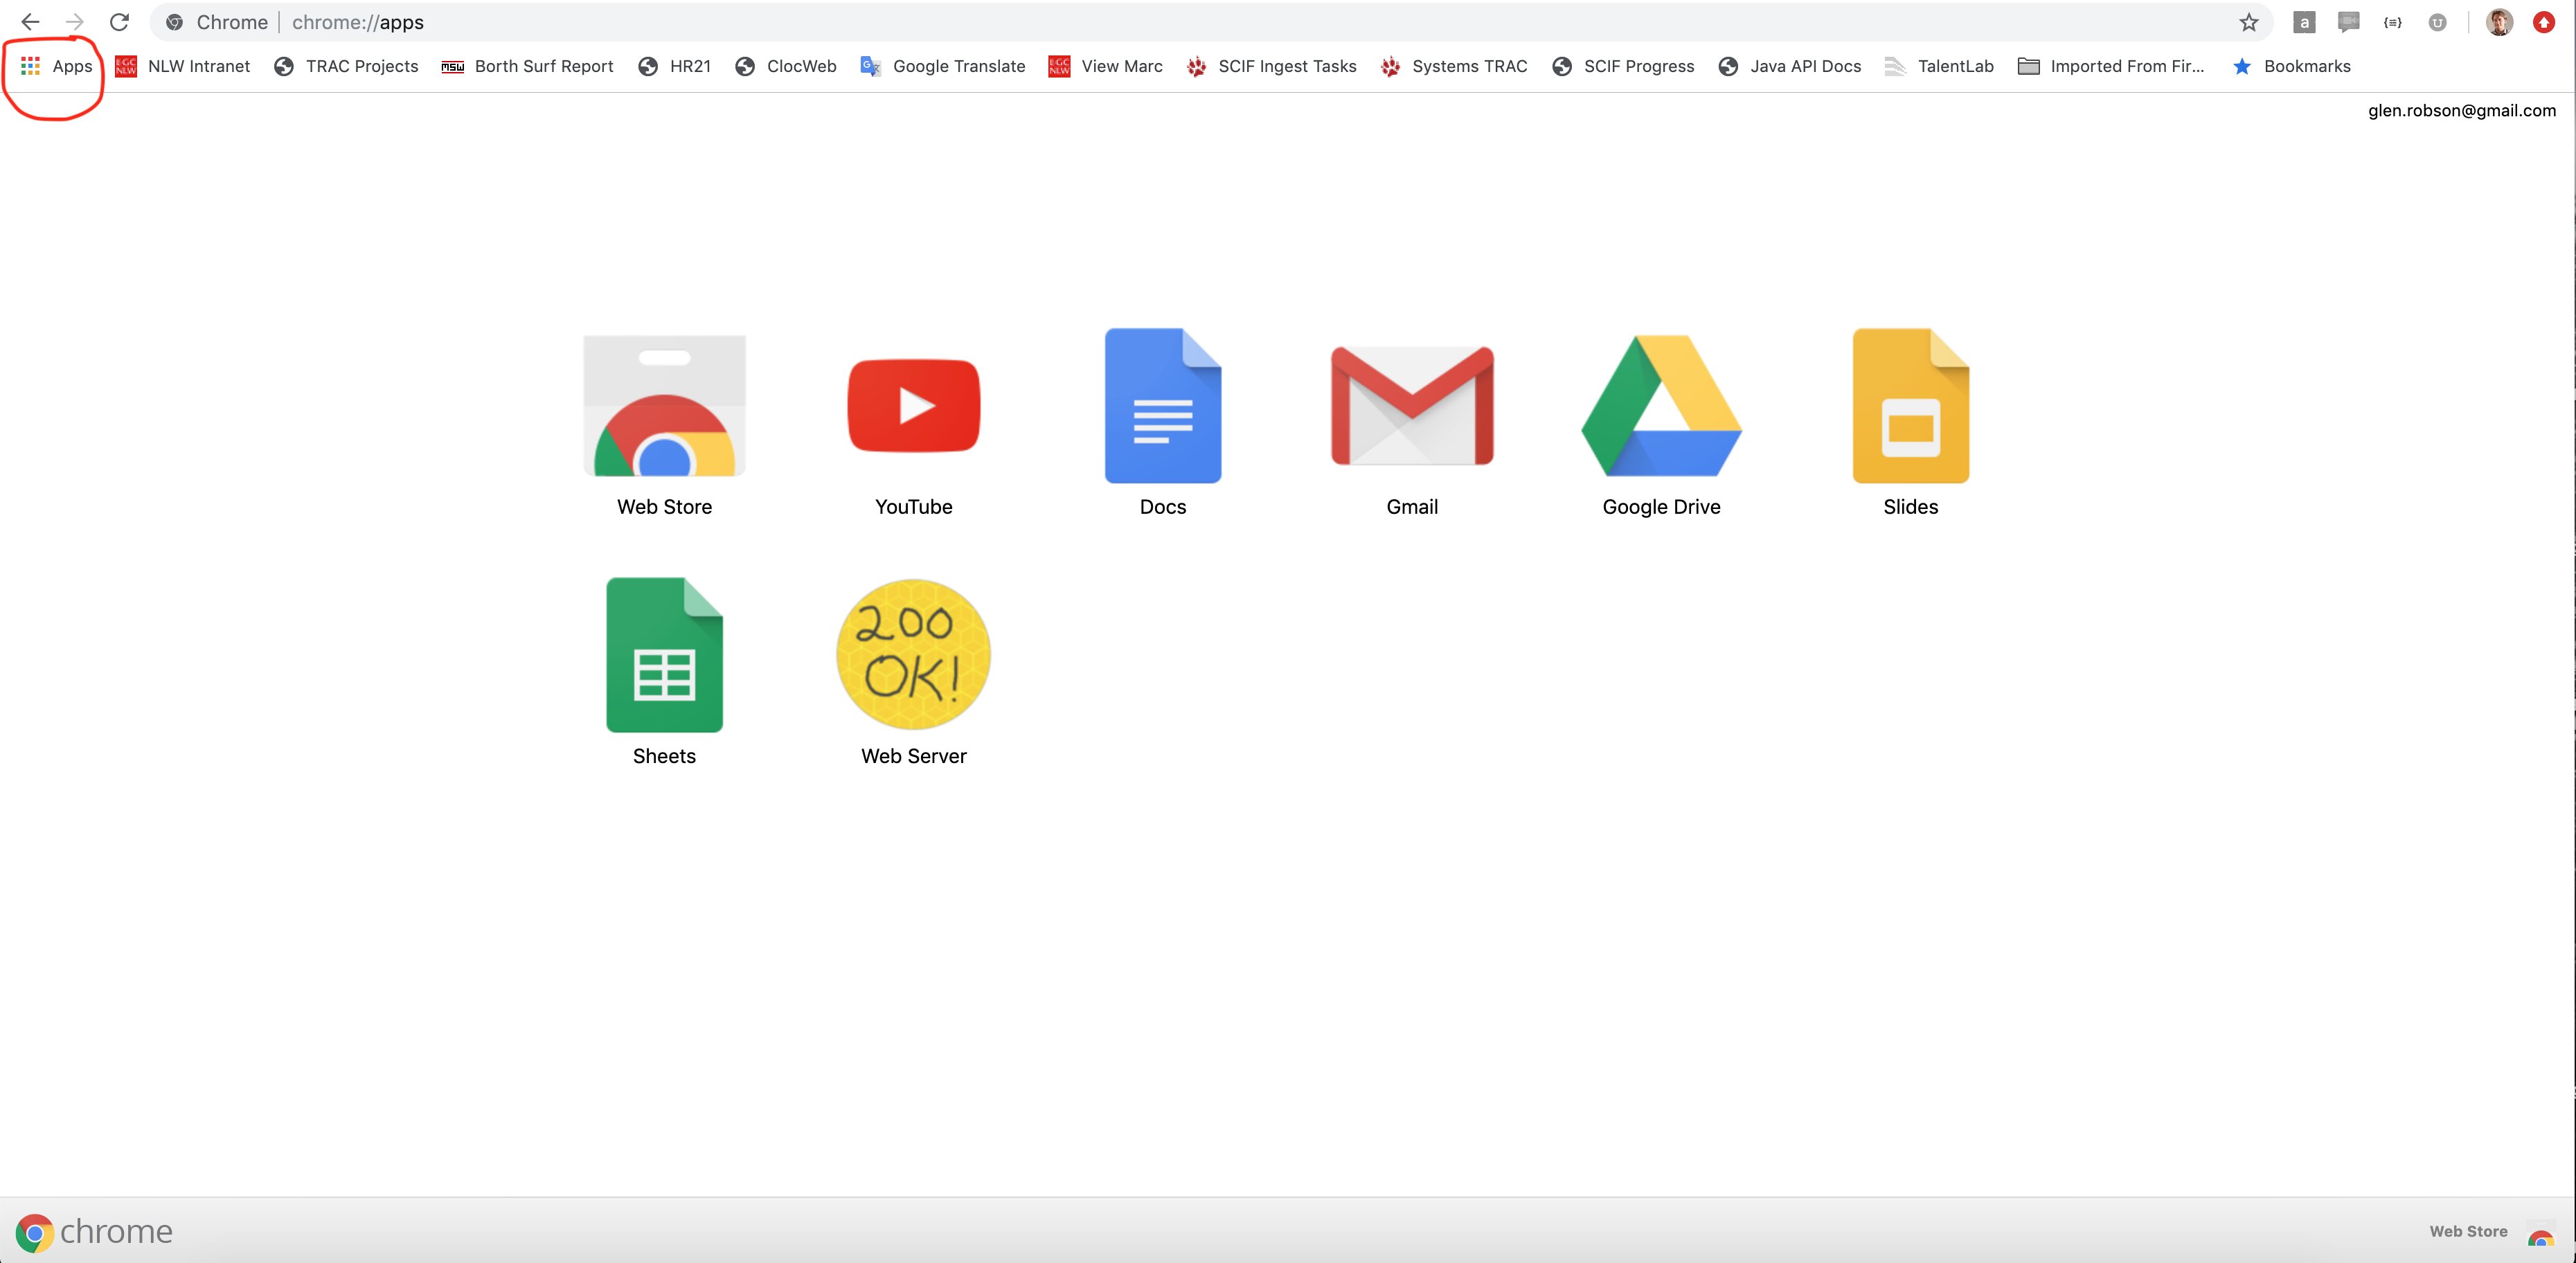
- Click the Apps button on the top left

- Click on the
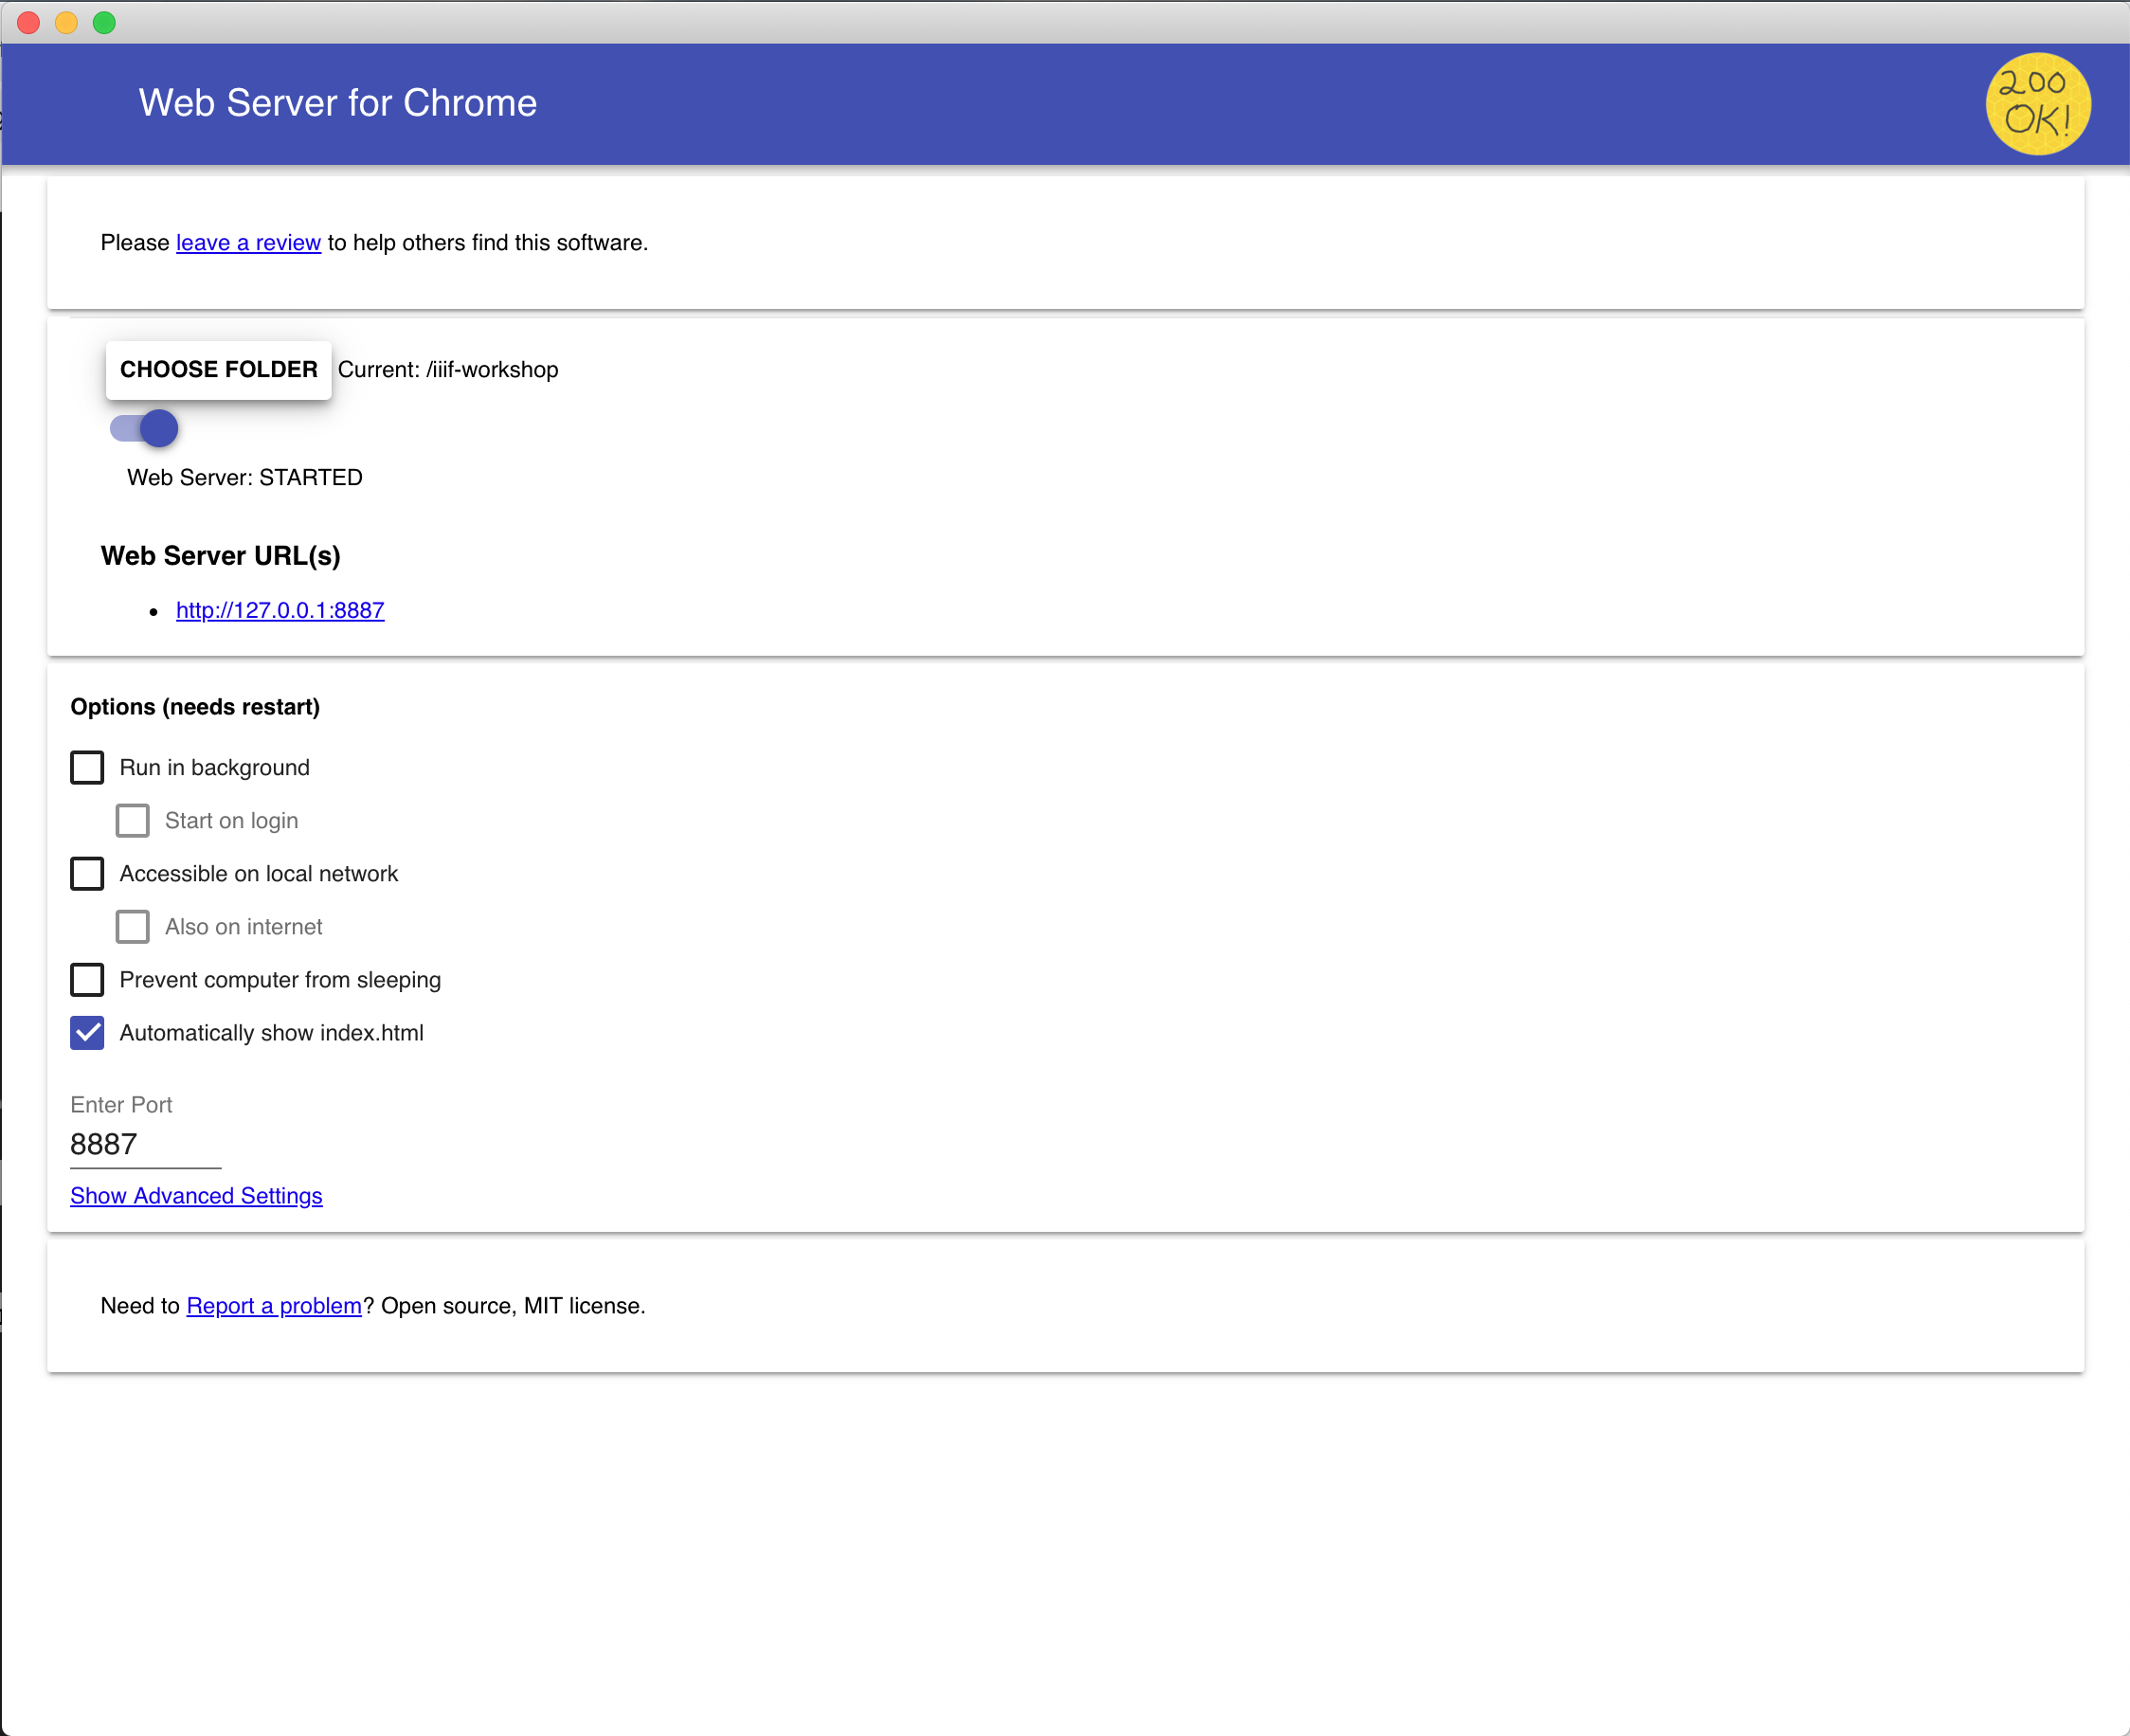
Web Server(if this is not listed ensure you have installed the prerequisites). - You should see the following:

- Click
choose folderand select youriiif-workshopfolder - Where it says
Enter portchange it to 8887 - Click
Show Advanced Settings - Ensure
Set CORS headershas a tick next to it.
Step 5: Serve your IIIF Image through a http server
- Open a browser and navigate to http://127.0.0.1:8887/
- You should see a
iiifdirectory and if you click that you should see your image file. - Click this directory then click on the
info.json. - If your image was called
image.jpgthe URL should be.
http://127.0.0.1:8887/iiif/image/info.json
- If you see the info.json you are now ready to view your image in a IIIF Image viewer.
Step 6: Show your image in a IIIF Viewer
You can now load your image to a IIIF image viewer. The main image viewer is OpenseaDragon. This takes the URL of the info.json. So if your info.json URL is:
http://127.0.0.1:8887/iiif/image/info.json
Open it with OpenseaDragon:
Step 7: Hosting your image publicly
You now have a working level 0 implementation. As you are using the Chrome plugin the images are only accessible on your machine. You can't share your images with other people. To be able to share your images you need to copy them to a public Web Server. As mentioned there are paid for services but you can also access free Web Hosting through GitHub which we will do next.